How to Sharpen a Bushcraft Knife: The Complete Guide for Beginners
Quick Answer
To sharpen a bushcraft knife, start with a 1000-grit whetstone to establish the bevel, move to a 3000-grit stone to refine the edge, and finish on a 6000-grit stone or leather strop for a polished cutting edge. For a Scandi grind, lay the bevel flat on the stone and maintain consistent pressure throughout each stroke. The whole process takes 10-15 minutes once you have practised it a few times.
What Equipment Do I Need to Sharpen a Bushcraft Knife?
You do not need much. A basic sharpening setup costs less than a decent takeaway meal, and it will last for years.
Whetstones
Whetstones (also called water stones or sharpening stones) are the foundation of knife sharpening. They come in various grits, and you need at least two.
1000 grit – Your coarse stone. This does the heavy lifting. Use it to establish or reshape the bevel, remove chips, and set the initial edge. If your knife is very dull, start here.
3000 grit – Your medium stone. This refines the scratch pattern left by the 1000 grit, creating a smoother edge that cuts more cleanly.
6000 grit – Your fine stone. This polishes the edge to a high level of sharpness. Not strictly essential for a working bushcraft knife, but it makes a noticeable difference.
A combination stone with 1000 grit on one side and 3000 or 6000 on the other is a cost-effective way to start.
Leather Strop
A leather strop is a strip of leather – often glued to a flat piece of wood – used to polish and align the very edge of the blade after sharpening on stones. Many bushcrafters consider the strop the single most important sharpening tool.
You can buy dedicated strops or make your own from a piece of thick vegetable-tanned leather. Apply a fine polishing compound (green chromium oxide is standard) to the leather surface for extra cutting power.
Optional Extras
A stone holder or non-slip mat keeps your stone steady during sharpening. A wet flannel works in a pinch.
An angle guide helps beginners maintain a consistent angle, though you will outgrow it quickly.
A magnifying loupe lets you inspect the edge closely. Useful for learning but not essential.
How Do I Sharpen a Scandi Grind?
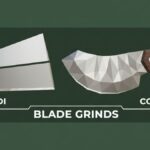
The Scandi grind is the most common grind on bushcraft knives, and it is also the easiest to sharpen by hand. This is one of the key reasons bushcrafters love it.
If you are unsure about grinds, our article on Scandi grind vs convex grind explains the differences and helps you understand what you are working with.
Step 1: Prepare Your Stone
Soak your whetstone in water for 5-10 minutes before use. The water acts as a lubricant, carrying away the tiny particles of steel (the slurry) that the stone removes from the blade.
Place the stone on a stable, non-slip surface. A damp cloth or dedicated stone holder works well.
Step 2: Find Your Angle
This is the beautiful thing about a Scandi grind – you do not need to guess the angle. Simply place the flat bevel of the blade directly on the stone surface. The bevel itself tells you the correct angle.
With the bevel lying flat, the entire ground surface should be in contact with the stone. You can check this by colouring the bevel with a permanent marker. After a few strokes, the marker should be removed evenly across the whole bevel. If only the edge or only the shoulder is being abraded, adjust your angle.
Step 3: Sharpen on the 1000-Grit Stone
Hold the knife handle in your dominant hand with a firm but relaxed grip. Place your fingertips of your other hand on the flat of the blade, near the edge, to apply even downward pressure.
Push the blade away from you across the stone in a smooth, sweeping motion. If the blade is curved, use a slight arc to maintain contact along the full length of the edge.
Apply moderate, consistent pressure on the forward stroke. Lighten the pressure on the return stroke or lift the blade entirely.
Work one side for 10-15 strokes, then switch to the other side. You are aiming to create a small burr – a tiny fold of metal that forms on the opposite side of the edge from where you are sharpening. You can feel it by gently running your thumb across the edge (perpendicular to the blade, never along it).
When you can feel a consistent burr along the entire length of the edge on both sides, you are ready to move to the next stone.
Step 4: Refine on the 3000-Grit Stone
Repeat the same process on your 3000-grit stone. Use lighter pressure than before. You are refining the edge, not reshaping it.
Work both sides evenly – 8-10 strokes per side is usually sufficient. The burr should become finer and less noticeable.
Step 5: Polish on the 6000-Grit Stone
If you have a 6000-grit stone, repeat with very light pressure. Five to eight strokes per side with gentle, even pressure. The edge should now feel noticeably sharp.
Step 6: Strop
The strop removes the final burr and polishes the cutting edge to its sharpest state.
Draw the blade backwards along the leather – edge trailing, not leading. If you push the edge into the leather, you will cut it. Pull the blade towards you with the spine leading and the edge following.
Alternate sides: 5-6 strokes on one side, flip, 5-6 strokes on the other. Repeat for 30-40 total strokes, reducing pressure gradually.
Your knife should now shave hair from your arm or slice cleanly through paper. If it does, you have done the job properly.
How Do I Sharpen a Convex Grind?
Convex grinds cannot be sharpened on flat stones in the same way as Scandi grinds. The curved bevel does not sit flat against a flat surface.
The traditional method is to use a leather strop – either a flat strop with compound or a strop made from a piece of leather laid over a mouse pad or similar slightly compressible surface.
Apply the blade at a low angle and use a sweeping, edge-trailing motion. The slight give in the surface conforms to the convex curve. Work both sides evenly with light pressure.
This is less intuitive than Scandi sharpening, which is one reason many bushcrafters prefer the Scandi grind. Our comparison of Scandi grind vs convex grind discusses the sharpening differences in more detail.
How Do I Sharpen My Knife in the Field?
You will not always have your full sharpening setup with you. Here are practical field sharpening methods.
Pocket Whetstone
A small, double-sided pocket stone (1000/3000 or similar) fits in a trouser pocket and handles most field sharpening needs. Use it exactly as you would a full-sized stone, just with less surface area.
Leather Belt Strop
In a pinch, the smooth back of a leather belt works as a field strop. It will not be as effective as a dedicated strop with compound, but it will realign a slightly dulled edge and buy you more cutting time before a proper sharpening session.
Smooth River Stone
A fine-grained, smooth river stone can function as an emergency sharpening stone. Look for stones with a silky, consistent texture – avoid anything coarse or grainy. Use water as lubricant and work gently.
Ceramic Rod
A small ceramic rod is lightweight and effective for quick touch-ups. Draw the edge along the rod at the correct angle, maintaining steady pressure. Ceramic rods do not remove much steel, so they are best for maintenance rather than reprofiling.
What Are the Most Common Sharpening Mistakes?
Beginners make predictable mistakes. Knowing them in advance saves frustration.
Inconsistent Angle
The most common mistake. If your angle changes during each stroke, you round over the bevel instead of sharpening it. With a Scandi grind, lay the bevel flat and keep it flat throughout the stroke. Your fingertips on the blade help maintain consistent pressure and angle.
Too Much Pressure
Pressing hard does not make sharpening faster. It creates deep scratches, removes excess metal, and can dish (wear a hollow into) your stone. Moderate, consistent pressure works far better than brute force.
Not Raising a Burr
If you switch sides or move to a finer stone before raising a burr, you have not actually sharpened the knife. The burr tells you that you have abraded steel all the way to the edge. Be patient and check for it.
Skipping Grits
Jumping from 1000 grit directly to stropping leaves a coarse scratch pattern on the edge. The edge may feel sharp initially but will dull quickly because the tiny serrations left by the coarse stone break off in use. Progress through the grits for a durable edge.
Ignoring the Strop
Many beginners stop after the stones, thinking the job is done. The strop makes a significant difference – it removes the final burr and polishes the edge. A stropped edge cuts more cleanly and lasts longer than an un-stropped one.
Sharpening Too Infrequently
Regular maintenance is easier than major resharpening sessions. A few strokes on a strop after each use keeps the edge in good condition. Waiting until the knife is truly dull means starting from scratch on the coarse stone.
How Often Should I Sharpen My Bushcraft Knife?
This depends on use, but here is a rough guide.
After every use: 10-15 strokes on a strop. This takes 30 seconds and maintains the edge between proper sharpening sessions.
Every few days of active use: A light session on the 3000 and 6000 grit stones, followed by stropping. Five minutes of work.
When the knife feels dull despite stropping: A full session starting from the 1000 grit stone. This is needed less often if you maintain the edge regularly – perhaps every few weeks of heavy use.
The steel of your knife affects sharpening frequency significantly. O1 tool steel holds its edge well and responds beautifully to stropping. Softer carbon steels need attention more often. Our guide to bushcraft knife steels discusses edge retention differences between common steels.
Frequently Asked Questions
What grit whetstone should I start with?
Start with 1000 grit for general sharpening. If the knife is very dull or chipped, you might need a 400 or 600 grit stone to do the initial heavy work before moving to 1000.
Do I need to soak whetstones before use?
Water stones (also called Japanese whetstones) should be soaked for 5-10 minutes. Oil stones do not need soaking but should be used with honing oil. Ceramic and diamond stones can be used dry.
How do I know when my knife is sharp enough?
The paper test is reliable: a sharp knife should slice cleanly through a sheet of paper without tearing or catching. The arm hair test works too – a properly sharp knife will shave hair effortlessly. For bushcraft, a knife that cleanly slices paper is sharp enough for any task.
Can I use a guided sharpening system instead of freehand?
Yes. Guided systems like the Lansky or Worksharp maintain a consistent angle for you. They work well but are less portable than stones. For Scandi grinds, freehand sharpening on stones is actually easier than using most guided systems because the bevel acts as its own guide.
How do I fix a chipped blade?
Start with a coarse stone (400-600 grit) and work the edge until the chip is removed. This may require removing a noticeable amount of steel. Once the chip is gone, reprofile through your normal grit progression. Large chips may be better addressed by the knifemaker.
Should I sharpen towards or away from the edge?
On stones, you can work in either direction, but most people find pushing away from the body (edge leading) gives better control. On a strop, always work edge-trailing (pulling the blade backwards) to avoid cutting the leather.
What is a burr and why does it matter?
A burr is a tiny fold of metal that forms on the opposite side of the edge when you have abraded steel all the way to the cutting edge. Feeling for the burr confirms that you have actually sharpened the knife, not just polished the side of the blade. The strop removes the burr to create the final clean edge.
Can I sharpen a knife too much?
Technically, every sharpening removes a small amount of steel. Over many years, the blade will narrow. However, a properly cared-for knife can be sharpened hundreds of times before this becomes an issue. Regular stropping extends the intervals between stone sharpening, preserving blade life.
Why does my edge dull quickly after sharpening?
This usually means you skipped grits or did not strop properly. A coarse scratch pattern creates a fragile edge that breaks down quickly. Work through the full grit progression and always finish with the strop.
Is it worth learning to sharpen freehand?
Absolutely. Freehand sharpening with stones is a fundamental bushcraft skill, costs very little, and works with any knife anywhere. Once you have the technique, it takes minutes rather than the hours you might fear.